|
|
Post by Dan MacMillan on Oct 11, 2010 5:19:15 GMT -5
A bit about myself. My name is Dan Macmillan. Some of you may know of me from the Samba. I have been there for many years, helping others with their Buggies, Beetles, Buses and Things.
I currently own and maintain the following.
68 Jeffries Mantaray II Kyote, I owned the Jeffries Kyote Site until geocities closed down..
66 Manx Closne
66 Manx
68 Ghia
74 Beetle
74 Thing
76 Homemade Double cab
78 Westy
The workings of the VW is not new to me.
I am a licensed class S, class T {formerly class A} and licensed Heavy Equip Mech in Ontario Canada, with over 25 years experience.
I am hoping to learn a lot here as I just purchased a GT2.
It is for the most part complete but looks terrible as the previous owner painted it with red Tremclad and a mop. It appears to have been partially built but never completed to the point of driving it on the streets. Over the years people have removed minor parts {gauges, switches, pedals....} The only major parts I appear to be missing are the rear window glass, Door top glass and outer door release buttons.
At the moment I have these questions.
There seems to be some confusion, maybe on my part, re the windshield.
Is the windshield on a GT2 from a donor car?
Is the Rear hatch glass from a donor car?
What was used for the door release buttons? How were they opened fromm the inside? There are no openings on my inner door panels.
I read that the top glass could be popped out. Was it originally glass and what was used to secure it?
Side glass for the doors. Is it supposed to be glass or plexi?
I have emailed Jeff re purchasing a CD.
I have also read people mentioning SUN RAY. Do they have a website? Any searches I have done are not finding one.
Well that's it for now. Happy Turkey Day to anyone here in Canada.
Later Dan
|
|
|
|
Post by brianboggs on Oct 11, 2010 5:44:05 GMT -5
Welcome Dan. The windshield is made for the GT2 and is not sourced from another car. There are a couple of people here working on a conversion kit of some sort but be preppared to do some fiberglass work. I think the rear hatch glass and side glass is more readily available from members here. Next time I am home to Toronto, or cottage country I'll look you up.
Brian
|
|
dean
Junior Member
 
Posts: 77
|
Post by dean on Oct 11, 2010 6:07:40 GMT -5
Jeff,s cd is money well spent I have a spare back glass and drivers side door glass if you need them.
Dean
|
|
stevevw
Full Member
   Part VW part Porsche , all Bradley
Posts: 117
|
Post by stevevw on Oct 11, 2010 6:37:09 GMT -5
Awsome glad to have you on board .
I love my twoie I just need more time to tinker with it .
Cheers , Steve
|
|
|
|
Post by Dan MacMillan on Oct 11, 2010 15:13:57 GMT -5
Jeff,s cd is money well spent I have a spare back glass and drivers side door glass if you need them. Dean Thanks CD is in the mail to me. Dean check your PM. |
|
|
|
Post by Dan MacMillan on Oct 16, 2010 7:57:57 GMT -5
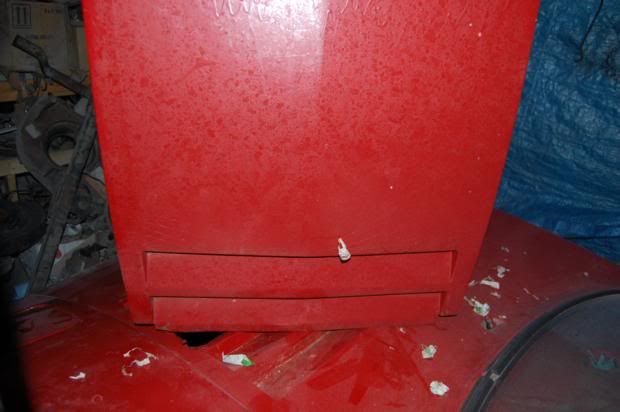 Was this a GT2, a GT2E or a mix? The front hood is long, but not as long as in some pics of the GT2E I have seen. It stops about 6 inches from the front of the car. Were they all long? I have seen some pics with short hoods that just cover the opening in the next picture. 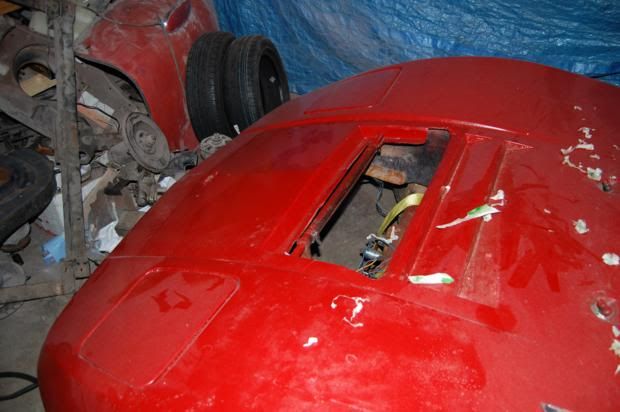 The dash includes a Bradley State of Charge gauge that resembles a fuel guage electrically. there are terminals on the back for Pos, Neg and signal {sending unit} but the one for sender is trimmed down. Also a Bradley Motor Amps gauge that requires an external shunt {cannot locate the shunt} and a Bradley Motor Volts gauge. 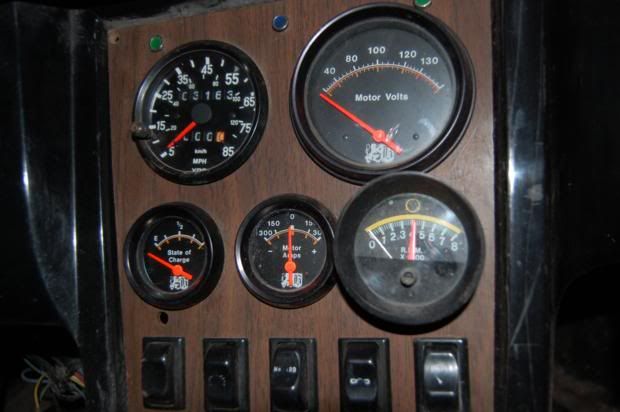 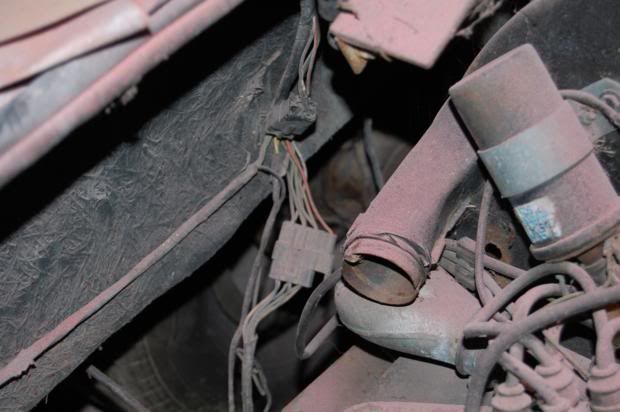 The only wiring leading to the rear has a few more wires than just lights and engine wiring. The battery box mounting can be seen but it only houses a small 12v battery. There is no wiring on the car that could handle the loads of an electric motor. There is also no signs that a rack to support the many batteries was ever installed, front or rear. 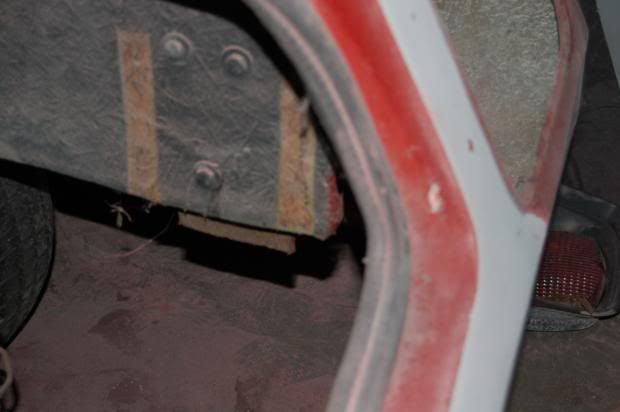 At least my tires and wheels fit nice. Currently on an adapter but will tuck in the needed 1/2 inch when I convert to disk brakes. 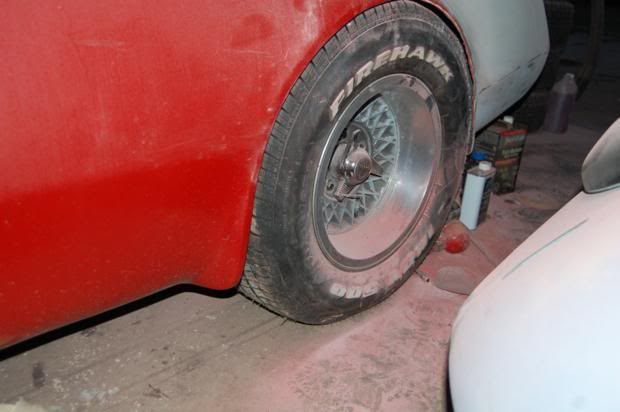 Sanding the 15 gallons of mop applied tremclad/rustoleum is going well. It has revealed a yellow top and a white body with black paint below the body line. Nice thing about this cheap red paint is that it is removeable with laquer thinner. Makes removal around complex areas and rubber parts relatively easy. 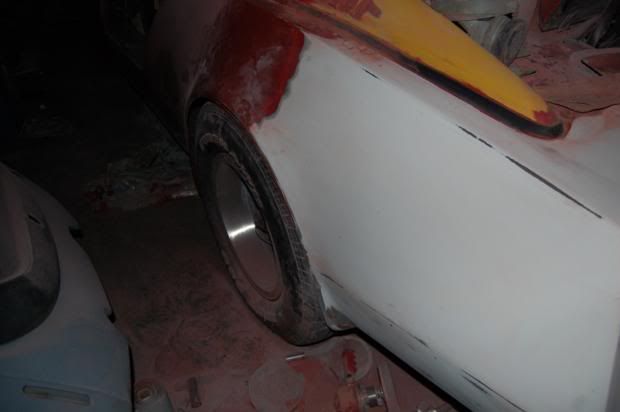 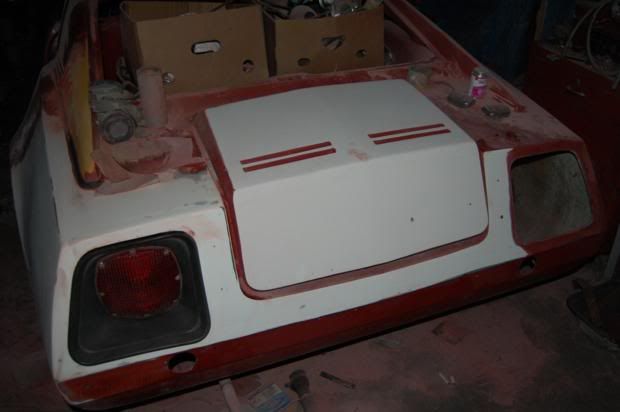 |
|
|
|
Post by mrbigh on Oct 17, 2010 20:46:13 GMT -5
DAVIDSIGOUIN
I sent you a PM
Horacio
|
|
|
|
Post by Dan MacMillan on Oct 18, 2010 6:11:19 GMT -5
DAVIDSIGOUIN I sent you a PM Horacio Check yours. |
|
bruce
New Member

Posts: 9
|
Post by bruce on Oct 18, 2010 16:49:33 GMT -5
The GTE or GTIIe hoods were "you cut it out yourself as straight as you can" in the kit version. So it could be shorter or what ever length you wanted, the same as the lower front and rear cutouts for the battery tray. The hood lock pin lock was glued on to the backside of the hood in the center front edge, should have had a block glassed in to mount it or used two pins or the center and two side stops like on a car-hood. Do you want to swap the EV gauges for ICE gauges?
|
|
|
|
Post by Dan MacMillan on Oct 18, 2010 18:33:18 GMT -5
The GTE or GTIIe hoods were "you cut it out yourself as straight as you can" in the kit version. So it could be shorter or what ever length you wanted, the same as the lower front and rear cutouts for the battery tray. The hood lock pin lock was glued on to the backside of the hood in the center front edge, should have had a block glassed in to mount it or used two pins or the center and two side stops like on a car-hood. Do you want to swap the EV gauges for ICE gauges? At the very front I have the raised square for the emblem, the hood has the latch pin in place but the way it is it overlaps the lower body louver. There are 2 louvers on the body and 2 on the hood. If I set the lower body louver against the upper hood louver then the front of the hood is even with the front of the car but noticeably highter where the louvers meet. If that makes any sense to you. Either way I put it I seem to be missing one louver. All other pics I have seen show 5 not 4. Hopefully my cd will be in tomorrow. Maybe it will explain what the PO did wrong. I do want to swap gauges. |
|
|
|
Post by Dan MacMillan on Oct 18, 2010 18:37:26 GMT -5
Got more sanding done 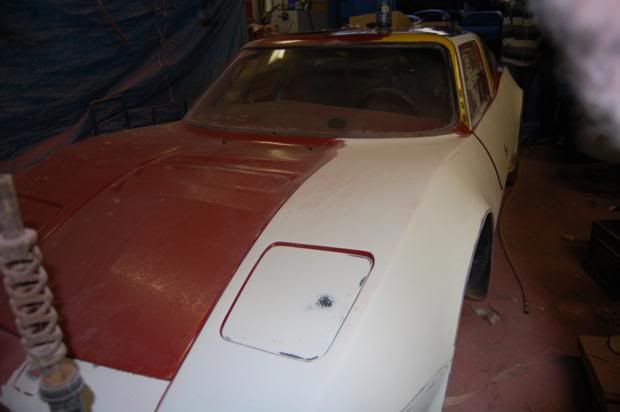 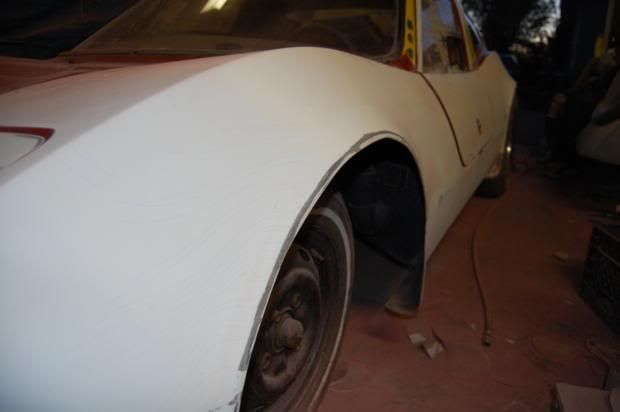 Decided to go with LED tail lights. May cover them with smoked plexi. 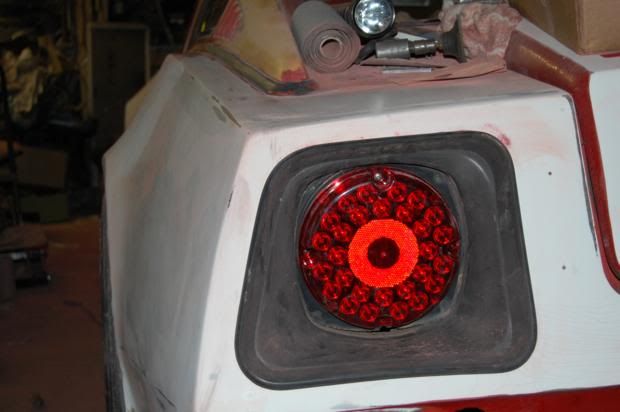 Made one roof panel today, getting some stainless carriage or elevator bolts tomorrow for them. 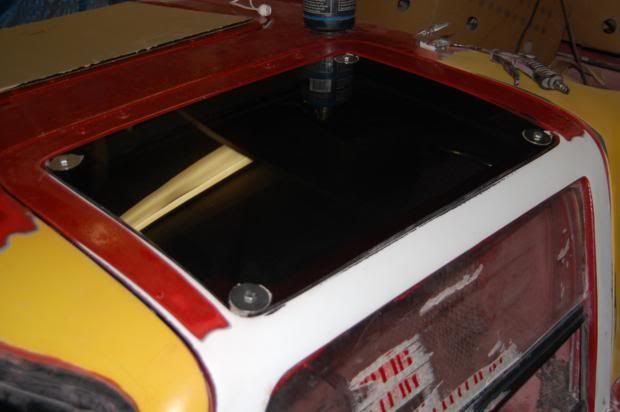 |
|
|
|
Post by brianboggs on Oct 20, 2010 5:22:07 GMT -5
Moving right along Dan. You'll have that thing driving before the snow flies!,,,,,, Maybe not!
|
|
bruce
New Member

Posts: 9
|
Post by bruce on Oct 20, 2010 15:44:16 GMT -5
Davidsigouin
What it looks like is that the front deck was never cut out and the side support rails installed to hold the hood up along the side edges for the E version hood. The small cut out you have is for the regular front access door/hood which the E access door/hood also mounted in the same location (hinge point). Your hood was cut and trimmed out to fit as an overlay, part way down the deck to the nose and cutoff before the Bradley medallion. Where the E versions hood ended at the nose and the latch pin would be about the bottom of the Bradley medallion (later mounted with screws and cover by the medallion). If you would like a PDF copy of the install PM me your Email. The tachometer is next to the speedometer and the bottom was regular amps, fuel, and oil pressure. On the top door Plexiglas you could use carriage bolts (better looks) with treaded spacers on the backside that will sit on the door frame so the panel does not stress the corners when tighten the knobs inside so it just seals, not crushes.
|
|
|
|
Post by Jeff Troy on Oct 20, 2010 20:11:25 GMT -5
Stainless carriage bolts and most any other type of stainless fastener are available through Totally Stainless in Gettysburg PA.
Good outfit.
Regards,
|
|
|
|
Post by Dan MacMillan on Oct 20, 2010 20:36:07 GMT -5
Moving right along Dan. You'll have that thing driving before the snow flies!,,,,,, Maybe not! For the past 8 years I have been doing one project a year. I usually start in Sept/Oct and my goal is to be on the road by June. So far I am 8 for 8. That is the goal for this one. Due to the shift I am on at work, I get blocks of 5 days off for 5 days on. This is great for getting things done. |
|
|
|
Post by Dan MacMillan on Nov 5, 2010 18:20:21 GMT -5
As some of you know I have being having a hard time getting struts for the door. No one up here can cross the part numbers that I have found on the net, and they do not list any by specs {only by application}. I even searched our local wrecking yard with no luck finding anything suitable. Well today while digging through my many parts saved over the years I found 2 struts that are a little similar to the proper ones. They were a bit longer, thinner and had different ends {flat with a hole in it} and a lot stronger. With nothing to lose I decided to see if they could be made to work.
I got some ball ends, cut the shaft to length and threaded them to fit the ball ends. On the cyl end I just turned the hole into a slot. I mounted them and found that they worked, however when threading them, the shaft got damaged on the end so one leaked. The good thing is they will work and there was a part number on them.
A quick trip to the parts store and I had an application, the number was good and they were 93-99 Pontiac Bonneville Hood Lift Supports, $22.00 each. None in stock but 3 at the warehouse {will be in tomorrow} . Needing a fourth I located one in stock at another store.
I took this one and tried a different idea. I cut the flat adapter off the shaft end, drilled out the threads on the ball {5/16} and fit them together. A bit of brazing {with a wet rag on the shaft} and it was done. On the cyl end I simply drilled the hole to 3/8. This allows that end to pivot on a bolt. The ball end is on the door while the cyl end is on the body. For this end I removed the ball stud from the plate on the body and secured the cyl loosely with a 5/16 bolt and a jam nut.
It works perfectly. Although these struts are 110 psi, they exert about the same as the originals due to the smaller diameter on the cyl.
When the new ones come in tomorrow I will take pics of the process.
|
|
|
|
Post by Dan MacMillan on Nov 14, 2010 17:04:21 GMT -5
Here is what I did for door struts. Using Monroe struts for 93-99 Pontiac Bonneville Hood Lift Supports. Monroe part number  This is how they look new. Notice the clips on the ends. I removed those.  Screw on ball ends. I drilled out the threads to 5/16" and cut the strut shaft as close to the end as possible to get rid of the old mount. Then I pressed them onto the strut shaft.  Next I cross drilled them to accept a pin. I used the "nail" portion of a 1/8" pop rivet.  Flattened the ends of the pin.  For the lower mount I just drilled out the hole to 3.8" so it would pivot on the 5/16" bolts.  Doors staying up now.  Installed my Corvair engine, trial fit.  Not much room at the rear to install. I cut out the piece that was reglassed in when it went from electric to gas. I will be making this piece removeable.  These trans mounts, for a 74 and up Beetle are by far the best and strongest. They work on all from 65 up. What is being sold as heavy duty are garbage compared to these. This design is such that should the rubber ever separate, the metal parts interlock and will not let the motor move more than a 1/4 inch. A must have for anyone running a performance engine.  During the next couple of days I will be adding a subframe, similar to the electric conversion frame to support the rear of the engine. |
|
|
|
Post by Dan MacMillan on Dec 9, 2010 11:06:02 GMT -5
Making progress. Got more of the red paint sanded off. Built most of the rear engine support cradle. Still working on the upper structure. Made fiberglass tail light pots and installed one so far. This gives me a flush surface on the rear panel. Installed LED tail light and made smoked plexi tail light cover. Sorted out 90% of the wiring, unglued the headlight assemblies {stuck with paint} and removed the crossbar/bearing assembly. Glass blasted everything, lubbed and reinstalled it, got the headlight motor working 100% using the original parts. Who said they are a pain? Simple setup and it works great. Removed 2 front trailing arms and removed the ball joints. Glass blasted and painted everything and installed new ball joints. Stripped all the brakes in preparation for 4 wheel disk. I went with the Chevy/Porsche rotors from www.cip1.ca and encountered a problem. The outer diameter of the front inner bearing area is not manufactured right. The rotors will not fit onto the spindles and hit the caliper support mounting brackets. No big deal as I will just machine the rotors in that area to get the needed clearance. I have notified CIP as to the problem so future customers will not have to deal with it. Sorry not many pics this time. I will be taking more later today. I do have some of the inst panel that I purchased from Don. Before 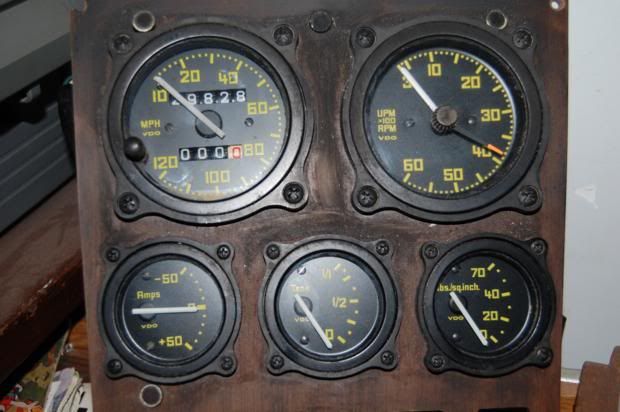 I found a nice little P-touch label maker that hooks up to my computer. $29 at Staples/Business Depot. It allows graphics and any font you have on your computer. Also found some gold on black tape for it. After 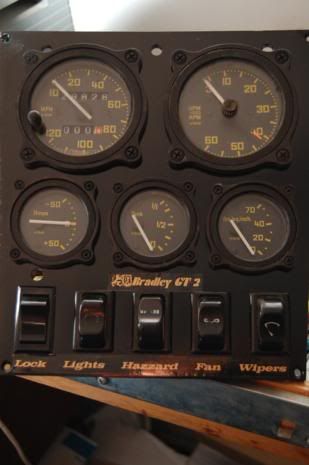 Found a universal fuel sending unit at Princess Auto for $9.99 reg $22.  With a little adjusting and flipping the sender over it works perfectly. Bonus is it has the same bolt pattern as a VW tank. May need baffles as the gauge is very sensitive. |
|
|
|
Post by mrbigh on Dec 9, 2010 14:09:21 GMT -5
Nice progress, I would like to see finish the Corvair install.
|
|
|
|
Post by Dan MacMillan on Dec 9, 2010 15:37:07 GMT -5
Nice progress, I would like to see finish the Corvair install. You will. I have to remove it as I now have the parts to reverse the rotation of the engine. |
|
stevevw
Full Member
   Part VW part Porsche , all Bradley
Posts: 117
|
Post by stevevw on Dec 9, 2010 19:07:52 GMT -5
Is it better to reverse the engine rotation or flip the ring and pinion in the transaxle ?
Corvair power has got to be really cool .
|
|
|
|
Post by Dan MacMillan on Dec 9, 2010 20:35:36 GMT -5
Is it better to reverse the engine rotation or flip the ring and pinion in the transaxle ? Corvair power has got to be really cool . Much better to reverse the engine. Flipping the diff will work but you end up drivind everything inside the tranny backwards, Synchros don't work right, thrust washers etc get messed as the thrust is going the wrong way. |
|
|
|
Post by Dan MacMillan on Dec 10, 2010 18:40:18 GMT -5
Got a lot of work done today. Finished the ball joints, blasted and painted tie rod assys, installed the 4 wheel disk brakes. Got my wheels installed. Fronts are a bit small so I may change them. I will know once I drop it to the ground. ] Tail light cover 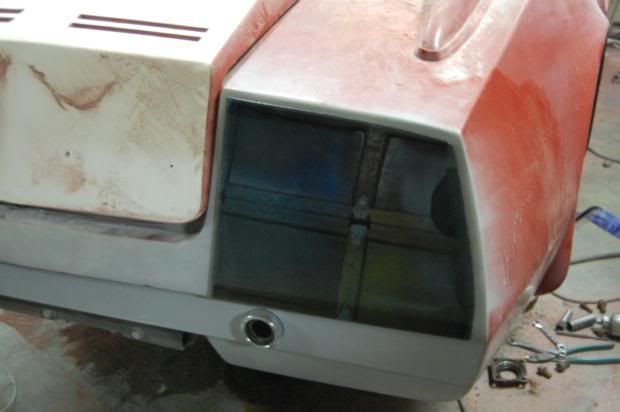 Cover with flash They really show up good when turned on, exhaust outlet below light 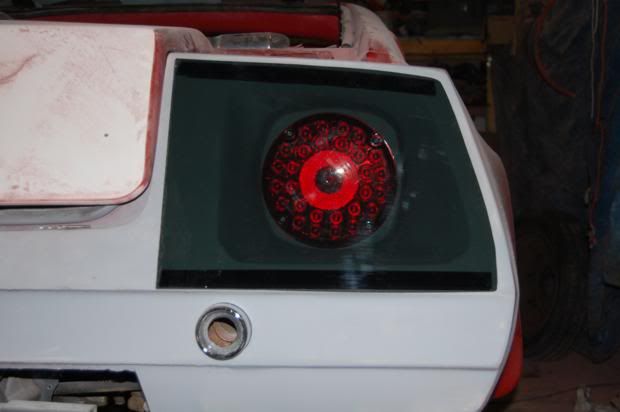 The beginnings of my corvair subframe, New Harley Davidson mufflers $40 for the pair at the flea market 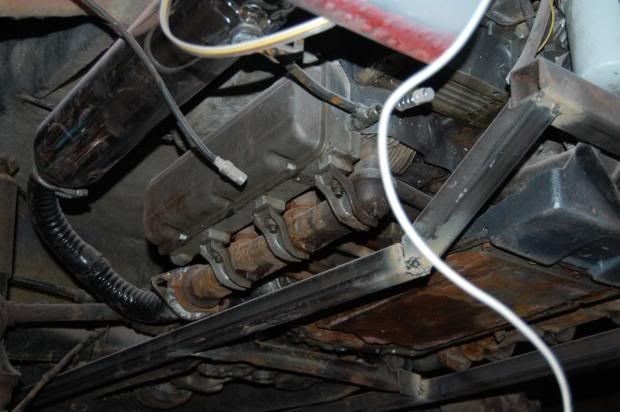 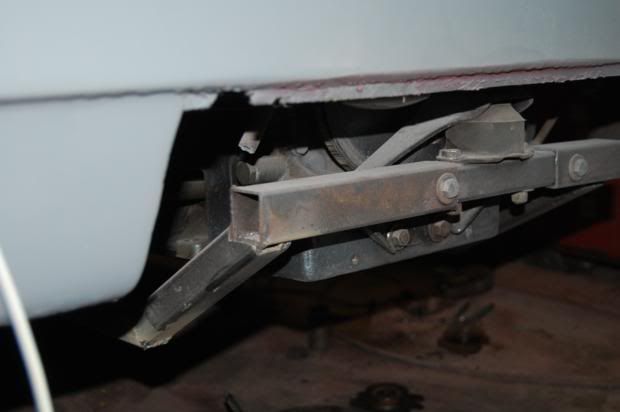 RF before 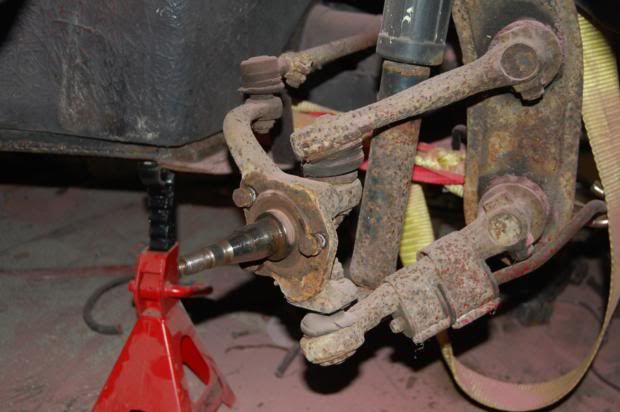 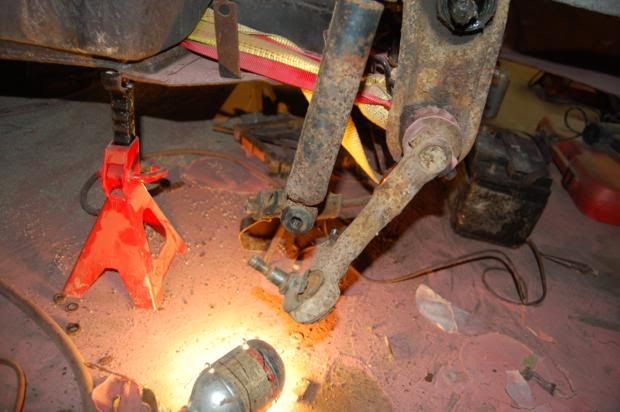 RF BJs before 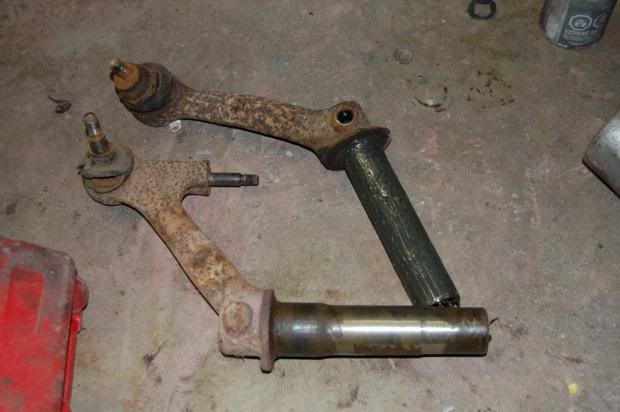 My press. Not the exact adapters needed but it did the job. 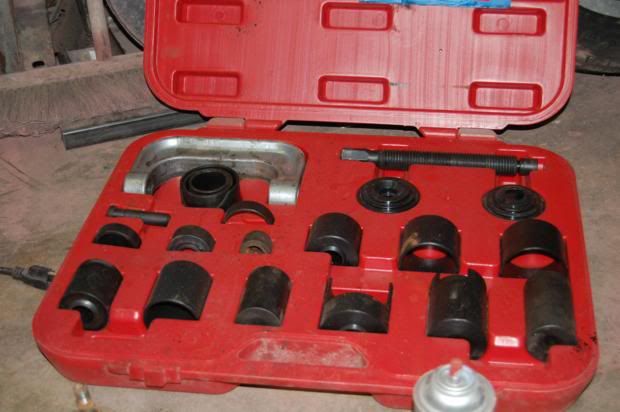 Pressing out a BJ 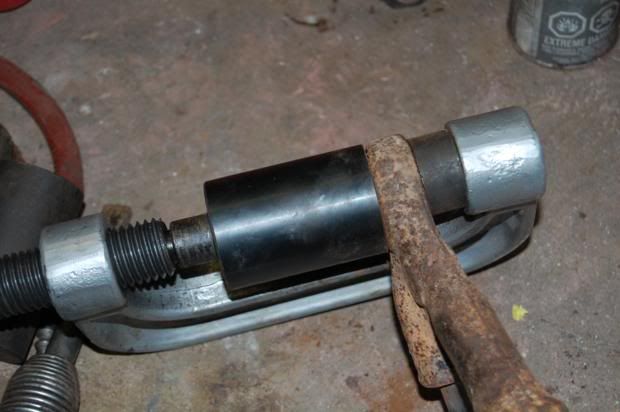 All Done, pressed out, blasted, painted and reinstalled 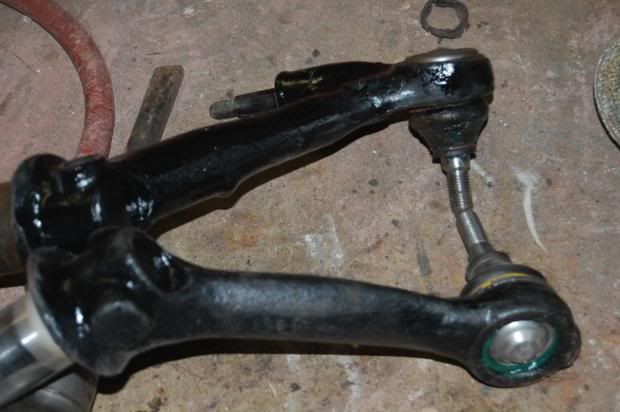 RF brake assembly 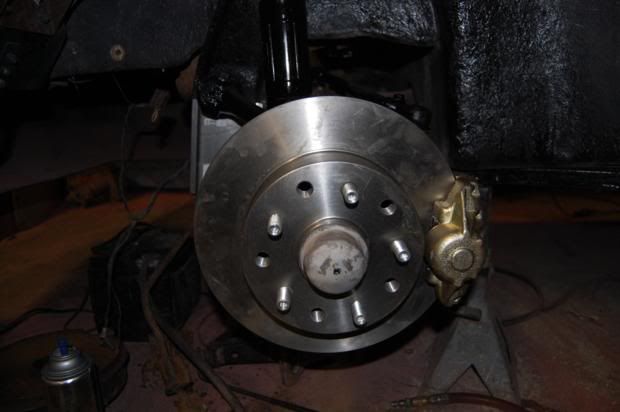 Rear trailing arm brakes removed 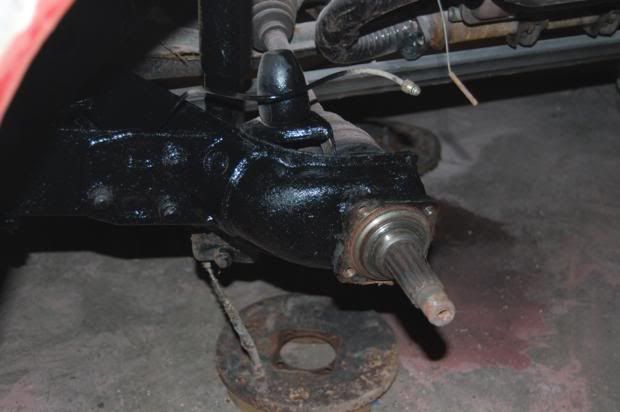 Rear brakes installed 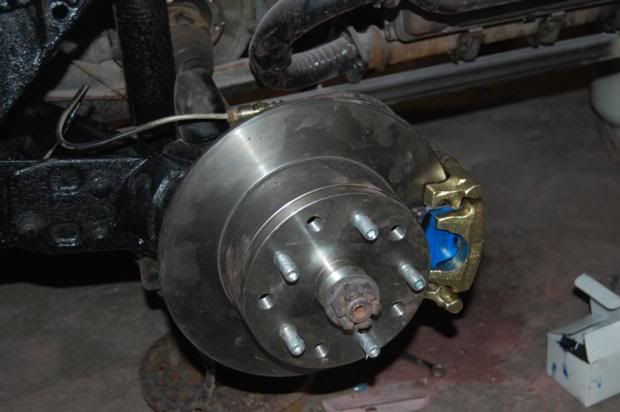 |
|
|
|
Post by Dan MacMillan on Dec 17, 2010 11:50:45 GMT -5
I lifted the body today and took the front suspension off. I am waiting for a new frame head. Decided to order one as they now have stock, instead of building one. The previous owner did the floorpans about 15 years ago but chose to use 1/8 steel plate with 1" square tube for the perimeter. It is a little heavy but will last a very long time. The Vair will take care of this extra weight. Also this weight will help offset the extra weight of the engine. The drivers side floor perimeter is about 1/2" low so that will get fixed to level out the body.
Wiper transmission was all seized. Stripped it down, blasted and painted, re-indexed the output of the motor to park low on the right instead of high on the left. I will also be making use of the park feature on the motor.
|
|
|
|
Post by Dan MacMillan on Dec 17, 2010 18:27:29 GMT -5
When do these pages move to the next page?
|
|
|
|
Post by Dan MacMillan on Dec 19, 2010 17:36:25 GMT -5
Spent the afternoon converting the driver's door to electric solenoid actuated. It was the hard one as I needed to modify the latch to release when pulled towards the front of the car. The [passenger side will be much easier]. I used the sliding door contacts from an Astro Van to get power into the door to actuate the solenoid, {no wiring exposed or running at the hinge line}. System for the doors is actuated remotely.
|
|
|
|
Post by jmurch on Dec 20, 2010 4:14:32 GMT -5
Spent the afternoon converting the driver's door to electric solenoid actuated. It was the hard one as I needed to modify the latch to release when pulled towards the front of the car. The [passenger side will be much easier]. I used the sliding door contacts from an Astro Van to get power into the door to actuate the solenoid, {no wiring exposed or running at the hinge line}. System for the doors is actuated remotely. I plan to do this, do you have any picutres? What solenoid did you use? Thanks, John |
|
|
|
Post by Dan MacMillan on Dec 20, 2010 21:12:44 GMT -5
Here are some pics of the electric doors. Lower contact plate from 198? Chevy Astro Van 2nd pic has part number. 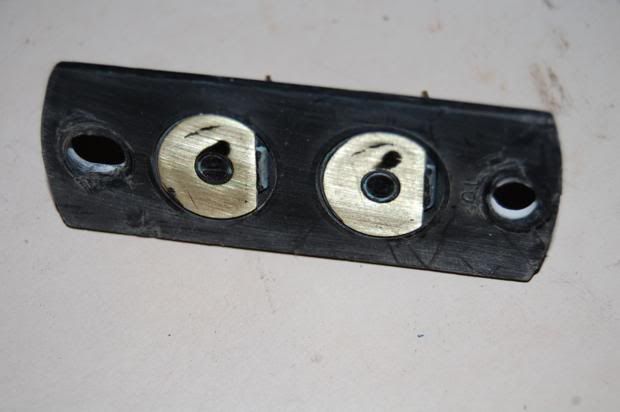 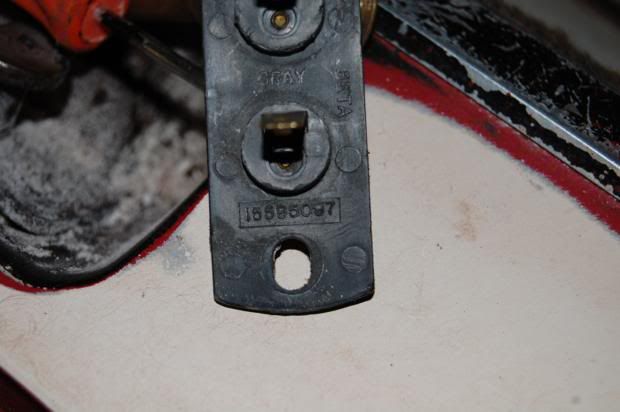 Upper pin plate installs in bottom of door. 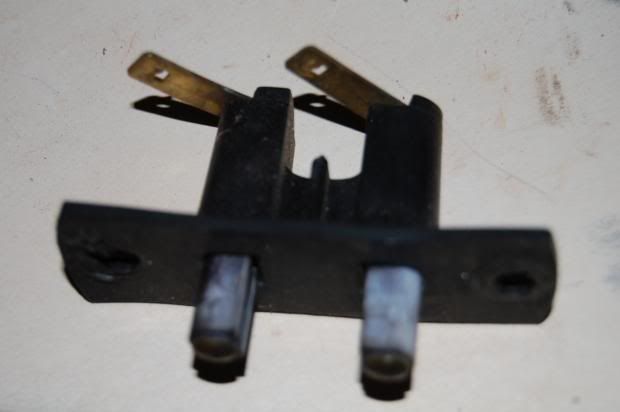 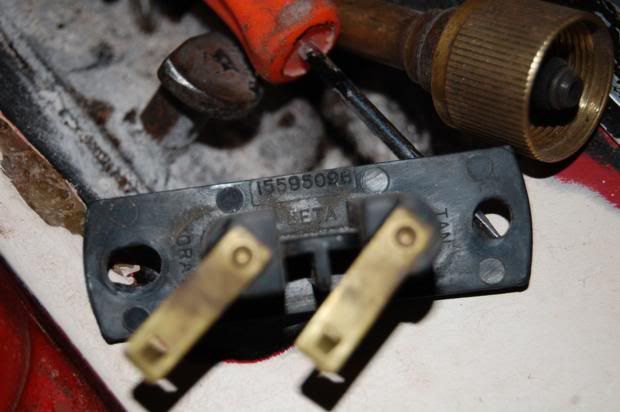 The glass in the lower part of the door opening is very thick, approx 1/2 inch. This allows you to flush mount the contact plate. Since the door travels in an arc, the pins actually slide onto the contacts. The contacts have to be flush. 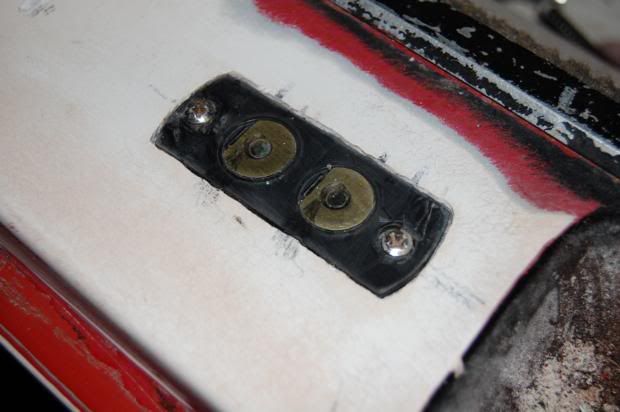 Pin plate as surface mounted in bottom of door. The 2 shiny bolts still have to have the heads ground thinner as they just touch the lower door opening. 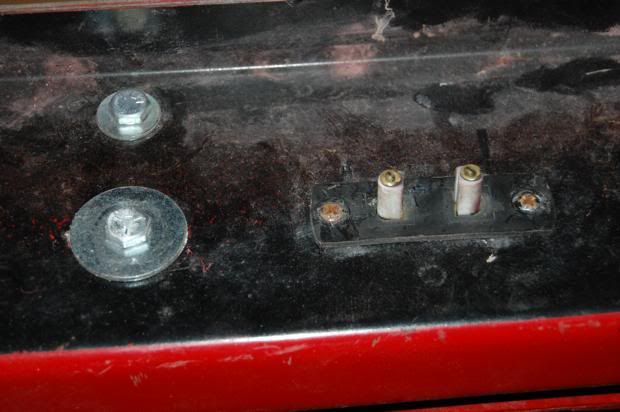 The solenoids I used were found in a box of parts. I have no idea of their origin. I have also used starter solenoids from VW 6v starters. Yes I said 6V. applying 12V to them will not hurt them. They are easy to mount and have tons of pulling power. Not that you need much to operaste these latches. 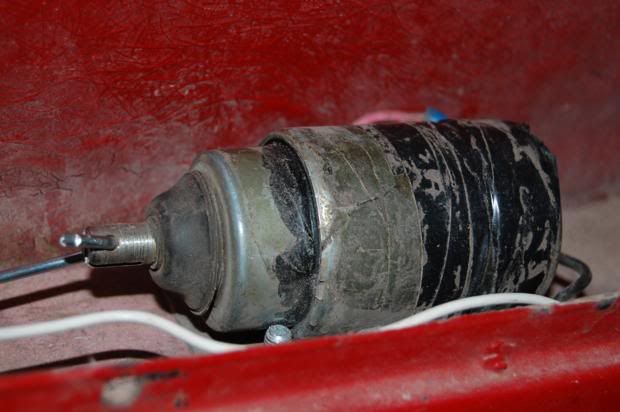 View showing release rod. This is just a piece of 1/8 spring steel, Available at most hobby stores that sell real RC planes. It is bent to allow some flex when the sol pulls it. 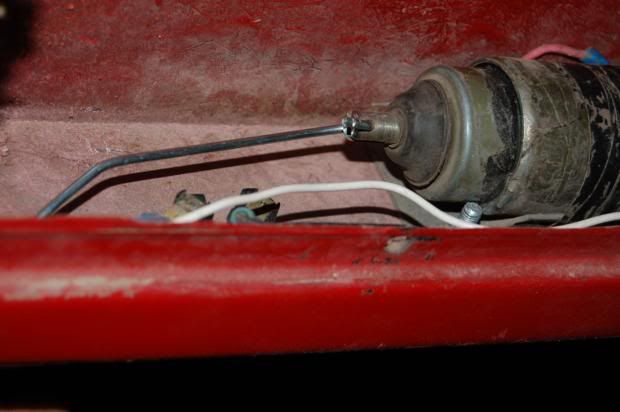 I could not get a good pic of the drivers latch today. I simply welded a bolt to the release arn in such a way that it crosses directly over the release arm pivot pin. To this I welded a nut for the release rod to hook into. There is minimal space to do this so measuring is critical, There can be no interference. Tomorrow I will removew the latch for a pic. On the pass side this welded bolt is not necessary as the latch already has to be pulled forward. Still to install is a manual lock. All electric doors require one to eliminate any chance of the door opening on it's own. |
|
|
|
Post by Dan MacMillan on Dec 20, 2010 21:33:00 GMT -5
Stereo install 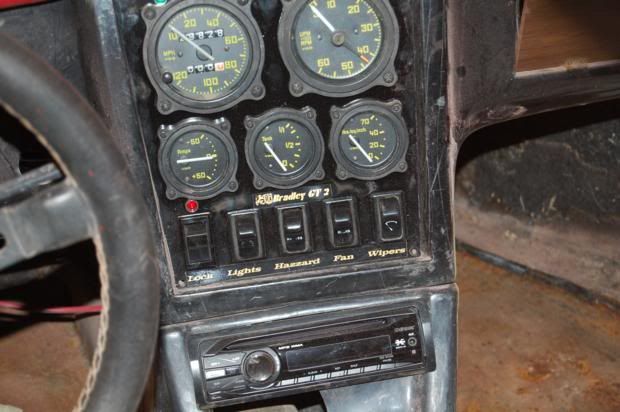 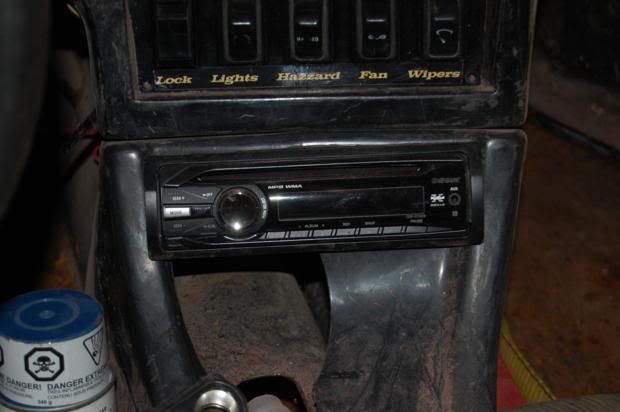 Corvair reverse rotation and VW adapter parts. Magnesium straight blade engine cooling fan 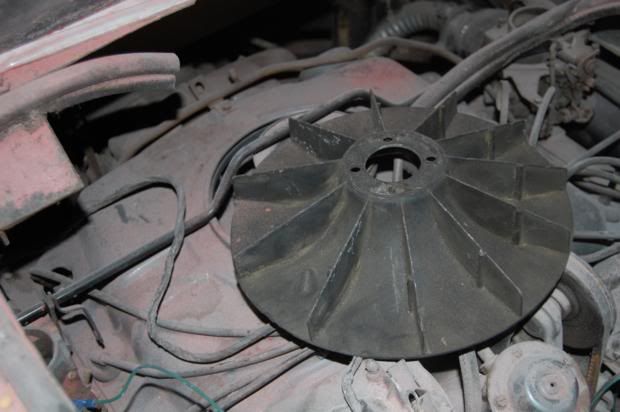 reverse rotation camshaft 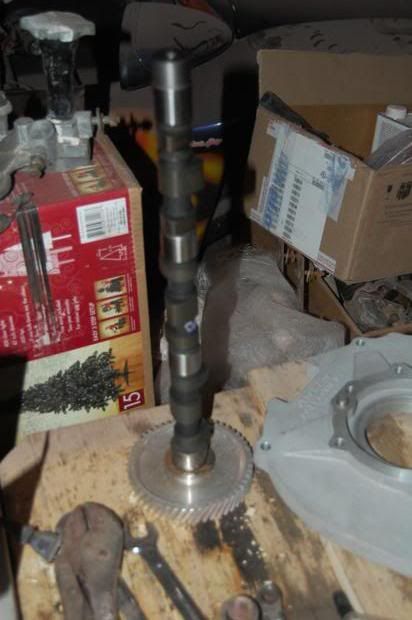 VW Corvair adapter plate 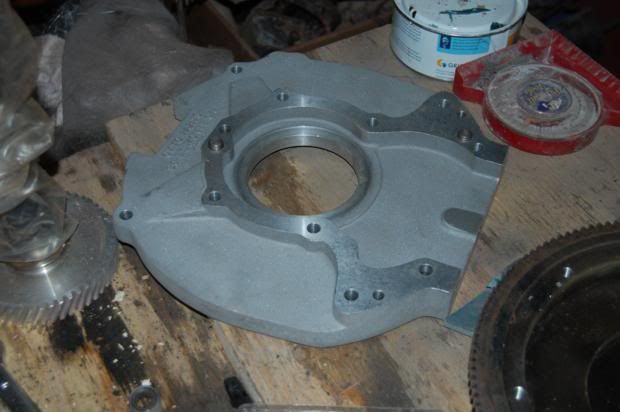 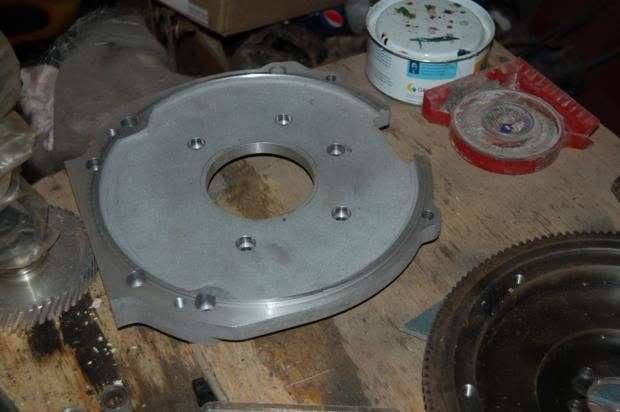 Distributor reversing gear 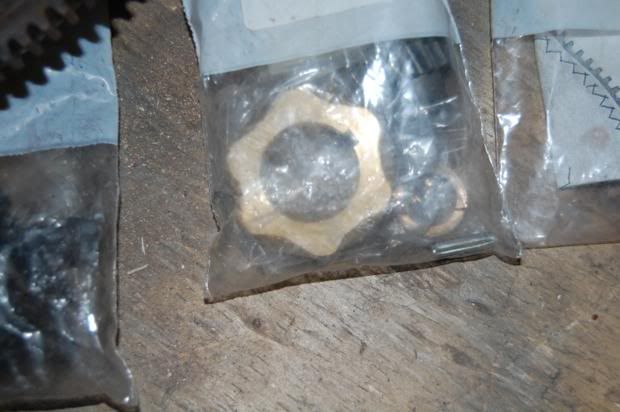 Corvair to 200mm VW clutch pressure plate. I am installing a HD throwout shaft and a 2100lb pressure plate with a Heavy-Duty Cushion Lock disc. In the past I have broken throwout shafts on milder applications. The HD ones are much stronger and I have never snapped a fork off of one. 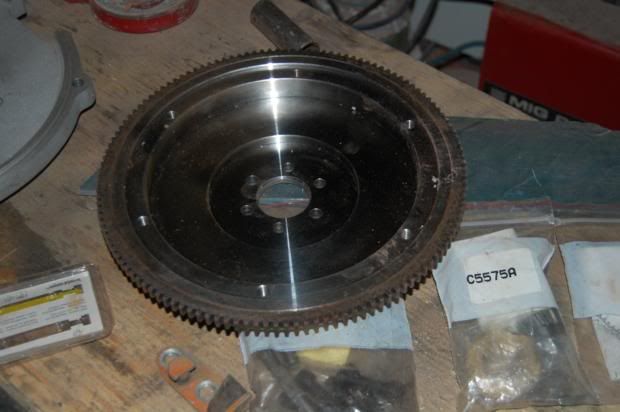 I have found a circuit that allows you to trigger a GM HEI ignition module with a set of points. This makes the points virtually last forever as there is almost zero current running through them. It also gives you the added bonus of computer controlled dwell and you can use a high output coil thus increasing your point gap to .045. This setup will also work for 4 cyl VW engines. From what I have been reading you can also trigger it with a points replacement module. Years ago I owned a Peugeot 505. It had a GM ign module and HEI E-core coil all mounted in an aluminum heat sink frame. I happened to keep 2 of them when I got rid of the car so I will be running HEI ignition on this ride. Oh ya, I rebuilt my pedal assy today 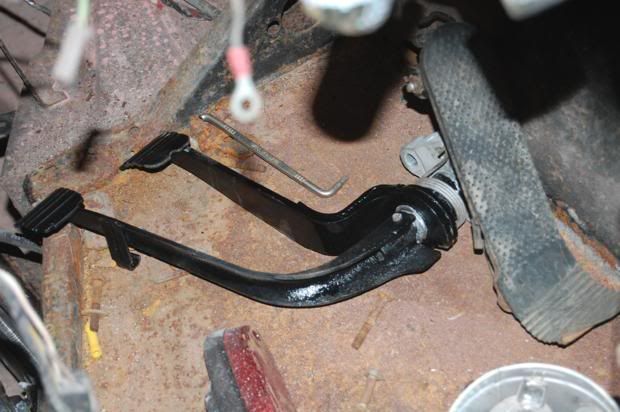 |
|
|
|
Post by Dan MacMillan on Dec 20, 2010 21:42:53 GMT -5
Here are the 2 types of VW tranny mounts available. 73 to 79 Beetle 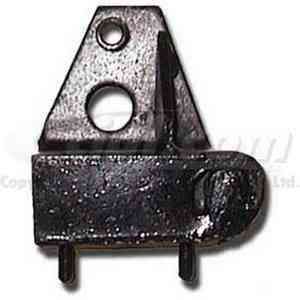 52-72 Beetle 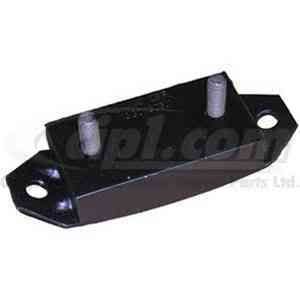 As you can clearly see the 73-79 is by far stronger and cannot separate if and when the rubber lets go, like the other style does. I use these on all of my cars. They do raise the engine slightly but they are well worth the extra $2 per mount. Note they are sold left and right. |
|


